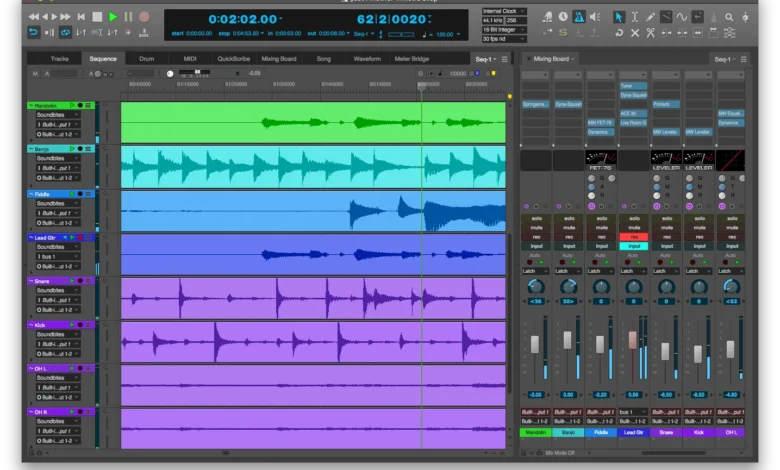
Can You Change Cache in Digital Performer? A Complete Guide

If you’ve ever worked with Digital Performer (DP), you know how crucial smooth performance is for music production. But what happens when sluggish playback or unexpected crashes disrupt your workflow? The culprit might be hiding in DP’s cache settings.
One of the key features of Digital Performer is its caching system, that improves performance by storing temporary data for quick access.
But can you change cache in Digital Performer? The answer is yes. You can change cache in Digital Performer. In this guide, we’ll explain how to optimize cache settings for better performance, prevent crashes, and free up disk space.
What is Digital Performer’s Cache System?
Digital Performer’s cache is like its backstage crew. It works invisibly to keep your sessions running smoothly.
It temporarily stores audio snippets, undo steps, and video frames so everything plays back instantly, without constantly re-reading files.
But just like a cluttered workspace, if it gets too full, things start slowing down or crashing.
Before tweaking cache settings, it’s important to understand how DP uses caching:
- Audio Cache: Stores temporary audio files for playback and editing.
- Undo History Cache: Keeps track of undoable actions.
- Video Cache: Stores video frames for smoother playback when scoring to picture.
By default, DP manages cache automatically, but manual adjustments can help optimize performance, especially on systems with limited storage.
How to Change Cache Settings in Digital Performer?
1. Adjust Audio Cache (Playback & Recording Buffer)
The audio buffer size affects real-time performance. A smaller buffer reduces latency but demands more CPU, while a larger buffer improves stability but increases delay.
Steps to change audio buffer settings:
- Go to Setup > Configure Audio System > Configure Hardware Driver.
- Look for Buffer Size. It is often measured in samples, e.g., 256, 512, 1024.
- Lower values (64–256): Best for recording with minimal latency.
- Higher values (512–2048): Better for mixing with heavy plugin use.
- Apply changes and test performance.
2. Clear or Relocate the Audio Cache Folder
DP stores temporary audio files in a cache folder, which can grow large over time.
To change or clear the cache location:
- Go to Setup > Preferences > Audio Files.
- Locate the Audio Cache Folder path.
- Click Choose to set a new location. Use a fast SSD.
- To clear cache, delete files manually from the folder. DP will rebuild them as needed.
3. Manage Undo History Cache
Too many undo steps can also slow down DP. Adjusting this can free up memory.
How to modify undo settings:
- Go to Setup > Preferences > General > Undo.
- Set a maximum number of undo steps (e.g., 30–50 is usually sufficient).
- Disable Save Undo History with Project if not needed.
4. Video Cache Optimization
If working with video, Digital Performer caches frames for smoother playback. It’s best if you do video cache optimization.
To adjust video cache:
- Open Setup > Preferences > Movie.
- Set Memory Cache Size. Higher values store more frames in RAM.
- If playback is choppy, increase this value if your RAM allows you to do so.
Read Also: eTrueSports iOS App the Complete Guide
Best Practices for Cache Management in DP
- Use an SSD for Cache Storage: Faster read/write speeds improve performance. If you use an SSD for storing cache, it will improve DP’s performance by a mile.
- Regularly Clear Old Cache Files: Old cache files cover a lot of space. Clearing these files can prevents unnecessary disk usage.
- Balance Buffer Size for Your Workflow: Go for a lower buffer size for recording, and a higher one for mixing.
- Monitor System Performance: Use Activity Monitor (Mac) or Task Manager (Windows) to check CPU/RAM usage.
Troubleshooting Cache-Related Issues in DP
- DP Running Slow?
Try increasing buffer size or clearing cache and check if any resource-heavy plugins are hogging your CPU.
- Disk Space Full?
Relocate the cache folder to a drive with more space. Or set DP to auto-delete old cache files after each session.
- Crashes During Playback?
Reduce undo steps or disable unnecessary real-time processing. Also, try freezing tracks with heavy virtual instruments.
FAQs
Where is the audio cache stored in Digital Performer?
By default, Digital Performer stores audio cache in:
- Mac: /Users/[YourUsername]/Library/Application Support/MOTU/Digital Performer/Audio Files Cache
- Windows: C:\Users\[YourUsername]\AppData\Roaming\MOTU\Digital Performer\Audio Files Cache
You can change this location in Setup > Preferences > Audio Files.
Does clearing cache in DP delete any important files?
No, clearing cache only removes temporary playback files. Your original audio recordings and projects remain intact.
What’s the best buffer size setting for recording vs. mixing?
Recording: 64–256 samples (minimizes latency).
Mixing: 512–2048 samples (reduces CPU strain).
Why does DP’s cache folder get so large?
DP continuously stores temporary audio data for quick access. Over time, unused files stack up and clearing them periodically helps free up space.
Can I disable caching entirely in Digital Performer?
No, caching is essential for smooth playback and editing. However, you can reduce cache usage by lowering undo history limits and relocating the cache to a faster drive.
Final Thoughts
Yes, you can change cache settings in Digital Performer. It can significantly improve performance. Changing buffer sizes for lower latency, clearing old cache files, or optimizing video playback can help keep DP running smoothly.
Apply these cache settings in Digital Performer and let me know which one worked best for you.


